
SET UP: do not use it ever. It applies the same bonding force
to the search height. You would impact at full bond force.
The set up force (by the service) for the search height is now 25 g.
If the bond force is chosen equal to 0: it means that the bond force
is still 25 g.
If the bond force is chosen equal to 3.0: it means that the bond
force is 50 g (only point known).
TEST: push it maximum for 5 seconds. It applies ultrasonic to the wedge, and it is good for cleaning when the wedge is clogged: put the tweezers in the middle of the needle and then press the button. The yellow led is an indication that there is ultrasound present, but no proof.
RESET: the wedge is brought to home position (set by the service) and the program goes back to step 1.
LIGHT: switches on the lamp.
CLAMP OPEN: opens the clamp (used when one needs to rethread the wire). If the clamp is left opened for too long time, the solenoid becomes very hot and for safety it gets disconnected. One has to reset.
HIGH RESET: not useful. It lifts the wedge to a higher level temporarily and releases it back to home position (set by the service) if the button is released. It is connected to the tension on the spring which is set low by the service so it may not work. To lift the wedge one can just manually gently pull the lever up. This may be useful if you have a chip carrier or something similar with a high border and you want to bond inside. (If you are bonding and the first bond is going wrong you may want to take away the sample from the working area, then you can also use the right lever to lift the wedge, then remove the sample and finish the bond in air).
Parameters:
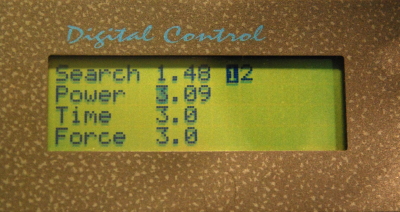
| Panel 1: Common parameters for panel 1 and 2:
|
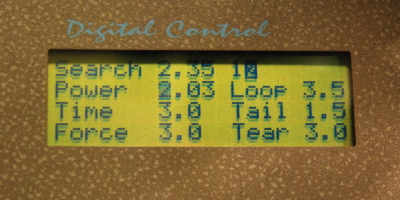
| Panel 2: parameters for this panel only:
|
|
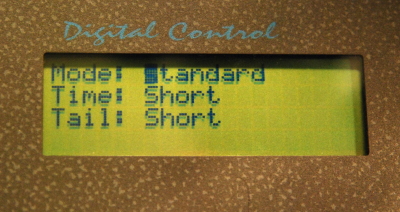
There is then a last page (panel 3) that should not be changed
because these settings are for 30 degree bonding (as in our case):
|
IMPORTANT: always start bonding from panel 1. If you start from panel 2 you reverse the bonding and mess up the system. Always finish the bond cycle. Notice that in the middle of a bond the clamp is open, so if you don’t finish the bond it will get overheated and disconnected for safety.
The force and power are correct when the width of the squeezed wire is about 1.5 times the diameter of the wire.
|
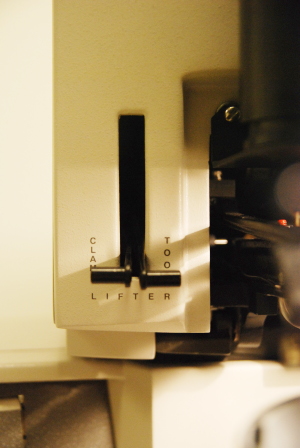
LEVERS:
Clamp: moves back the clamp, useful to get more space around the wedge, e.g. when re-threading. Tool: moves up the lever arm, useful for lifting up wedge over a high border surrounding bond pad, or to move away if the first bond steps fail.
|
|
|
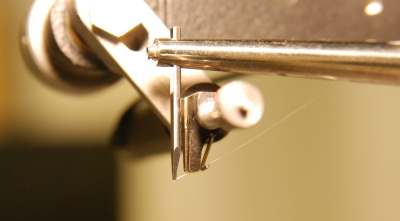
| Right position of the wire through clamp and wedge |
Note! If the clamp is left opened for too long time, the solenoid becomes very hot and for safety it closes and one has to reset.
Height of the wedge:

|
|
|
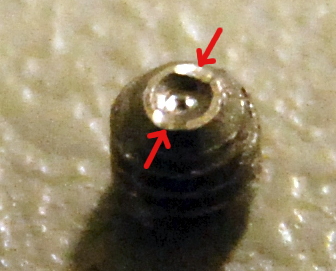
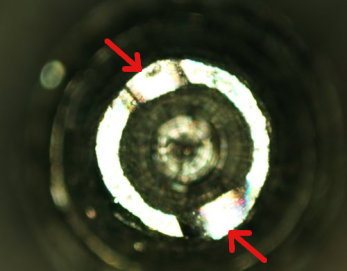
| Gauge, length in mils inscribed in base | Old screw, red arrows indicate broken parts | |
It is very important to get a good mechanical contact and be in resonance to get a good ultrasound. When one needs to remove the wedge (because it is broken or for cleaning), then it is very important to place it back in the correct position.
To put the needle back do the following:
This is the only thing one can touch out of all the mechanical assembly, and the form of the screw is very crucial. It has to be replaced after several uses (not more than once a year), an very bad one is shown in the pictures.
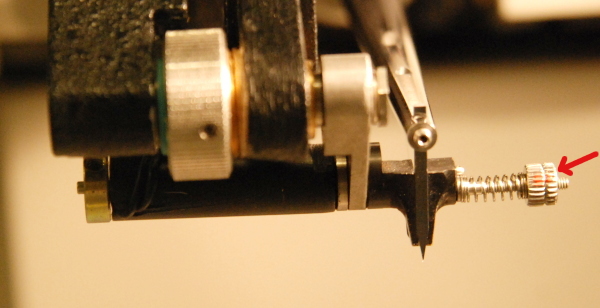
| Do not touch these screws. The force is calibrated |
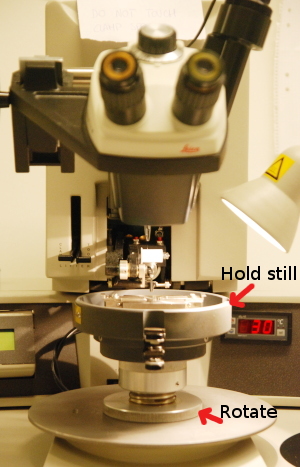
Set height of the work holder (see also pdf file on lab computer):
Obs. The wire will for sure get unthreaded in this step, but you can pull it out a bit more before doing the bonds in air.
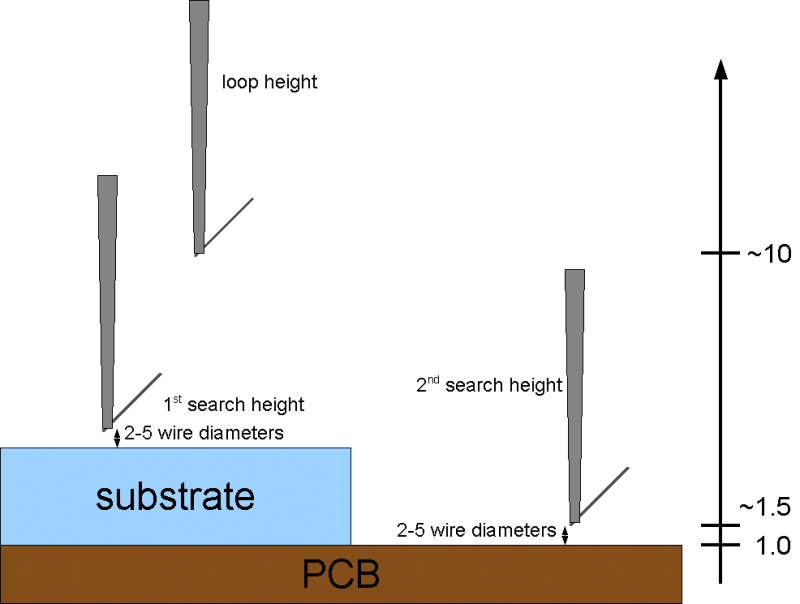
SEARCH/LOOP heights
You are now ready for bonding but you have to adjust the parameters first. Power, time and force can be left at the default values. The only parameters that should be set are SEARCH height for 1st and 2nd bond, and LOOP.
During the ‘’search’’ the wedge goes smoothly downwards applying 25 g force and stops at the 1st search height. When you release the left mouse button it continues going down. There is a default time after which the bonder bonds. It is very important that the search is not too high: if it is too high the time is not enough to nicely reach the surface. It starts to bond in the air and will crash into the bond area with full force and ultrasound.
BONDING
Automatic mode (first bond: sample chip, second bond: PCB)
Manual
mode
The idea is the same as for the automatic mode: the height of the work-holder is set in the same way, and power, time and force have the same meaning in both modes.
The search heights are just for the automatic mode. The manual mode uses the loop height: one could set a quite big loop height and release the button just at the wanted height (decided looking in the microscope).
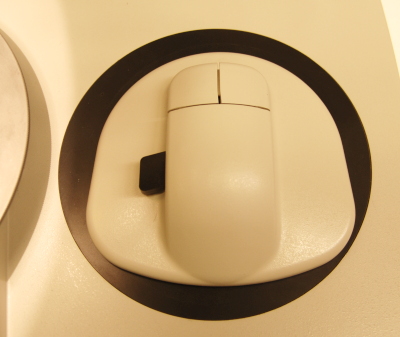
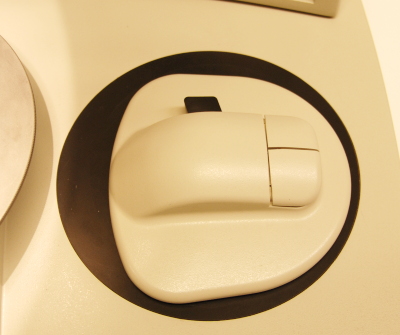
Somebody may find it easier to work with the work-holder rotated 90 degrees and use the index-finger to command as shown in the picture.