|
|
The Median modify command is similar to Lowpass; it reduces the contributions of high spatial frequency, reducing contrast in regions of high contrast. The advantage of Median over Lowpass (averaging) filter is that the Median will eliminate lone "bad pixels" without significantly affecting the resolution of the image. |
In the Median command, data is analyzed in kernels (matrices), with every pixel individually recalculated based upon its neighboring values. For example, data which is undergoing a Median filter applies a 3x3 or 5x5 matrix operation to each image pixel.
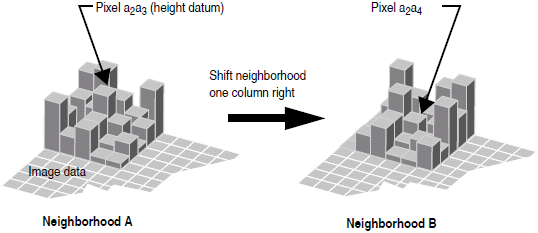
Figure 1: Median Data Analysis Depiction
Each pixel is individually evaluated within its own local, 5 x 5 “neighborhood.” Neighborhood A has pixel a2a3 at its center. For a Median filter, the 25 pixels in neighborhood A are evaluated to locate the median value pixel. The median value of neighborhood A is then mapped to a new pixel a2a3 in a separate data set. The matrix is shifted over one column to define a new neighborhood (“B”) with pixel a2a4 at its center. The median value for neighborhood “B” is found, then mapped to pixel a2a4 in the separate data set. The filtering process is repeated until all pixels have been remapped.
In this and all other matrix operations, pixels are mapped to the new, separate data set without changing pixel values in the original image data until saved. (Matrices do not operate cumulatively on previously filtered data.)
The size of the filter’s sliding window pixel array is set under Inputs > Median Order. Increasing the Median Order increases the pool of pixels from which each value is calculated, and effectively increases the blurring effects of the filter.
The effects of three different size pixel arrays (3 x 3, 7 x 7, 11 x 11, left to right) applied to the same image are shown in Figure 2.
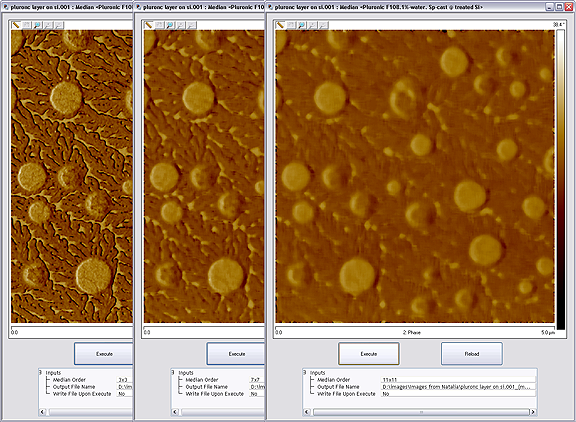
Figure 2: Median Pixel Array Effects
|
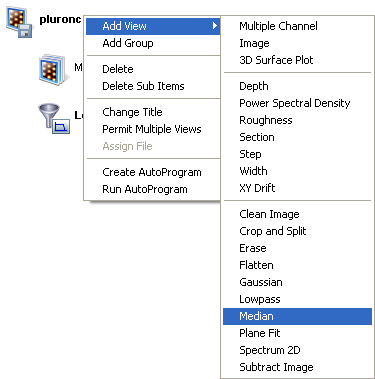
Figure 3: Select Median from the Workspace
|
Or
Or
Or |
|
|
|
|
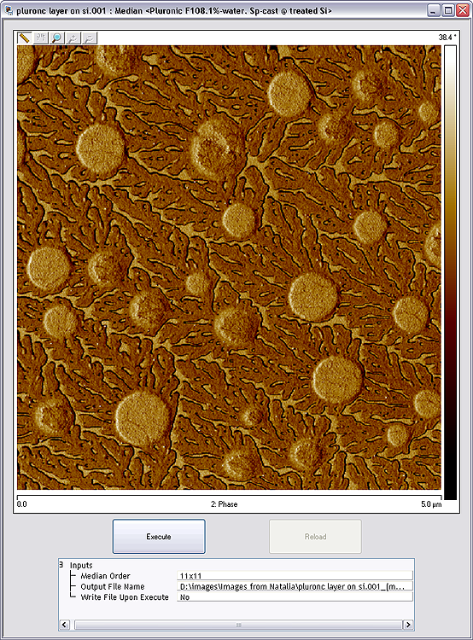
Figure 4: The Median image interface
|
| www.bruker.com | Bruker Corporation |
| www.brukerafmprobes.com | 112 Robin Hill Rd. |
| nanoscaleworld.bruker-axs.com/nanoscaleworld/ | Santa Barbara, CA 93117 |
| Customer Support: (800) 873-9750 | |
| Copyright 2010, 2011. All Rights Reserved. |