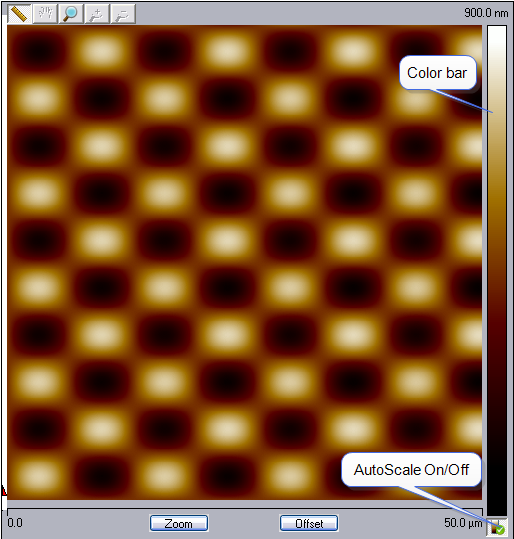
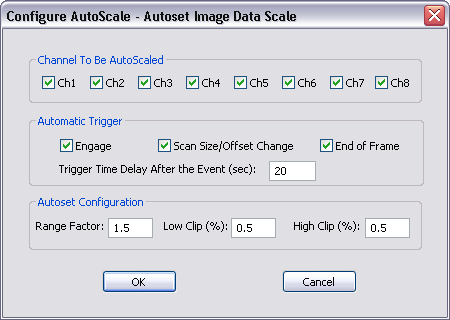
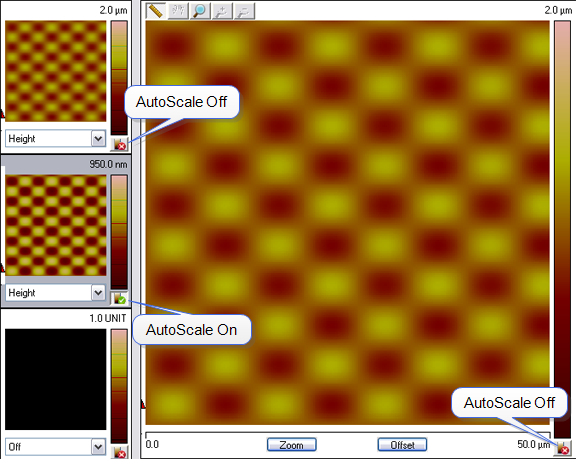
The AutoScale On/Off button, shown in Figure 1, appears below the color bar in both the image and thumbnail windows. Auto scaling is performed in selected windows according to user-defined auto scaling rules. These rules are defined in the Configure AutoScale window, shown in Figure 2.
Figure 1: A NanoScope Real-time Scan Window
|
|
Open the Configure AutoScale window either by clicking Tools > Config AutoScale, shown in Figure 3, or by right-clicking an AutoScale On/Off icon. |

Figure 3: Click Tools > Config AutoScale
|
|
Click the AutoScale On/Off icon, shown in Figure 4, at the bottom of the color scale to turn AutoScaling On (green checkmark) or Off (red X). |
| Parameter | Description |
|---|---|
|
Engage |
AutoScales the selected channels after engaging. |
|
Scan Size/Offset Change |
AutoScales the selected channels after a change in Scan Size or Offset. |
|
End of Frame |
AutoScales the selected channels at the end of a frame. |
|
Trigger Time Delay After the Event (sec) |
The delay after a trigger event before AutoScaling is applied. |
| Parameter | Description |
|---|---|
|
Range Factor |
Sets the vertical scale to be Range Factor * (range of data after clipping). |
|
Low Clip (%) |
The Low Clip function clips a small, user-adjustable, number of pixels to accommodate long tails in the bottom of the distribution. See Figure 6. |
|
High Clip (%) |
The High Clip function clips a small, user-adjustable, number of pixels to accommodate long tails in the top of the distribution. See Figure 6. |
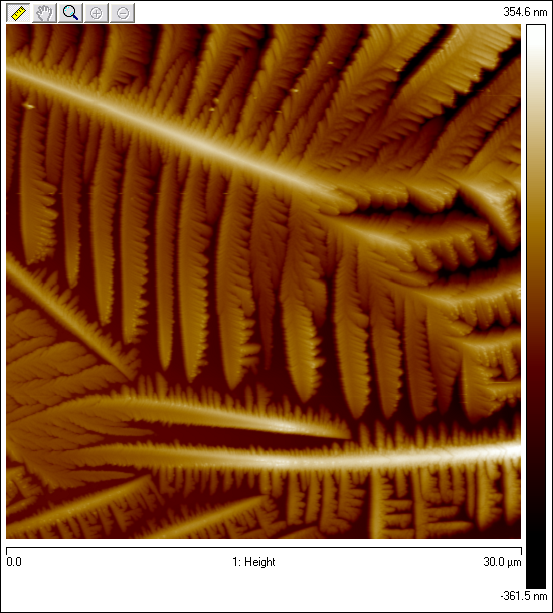
Figure 5: Height image of Hyaluronic Acid
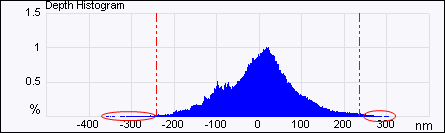
Figure 6: Histogram of image in Figure 5 with the Low Clip and High Clip portions circled.
|
|
You may force AutoScaling on all selected channels at any time by clicking the AutoScale Image Data Scale icon, in the NanoScope toolbar. |
| www.bruker.com | Bruker Corporation |
| www.brukerafmprobes.com | 112 Robin Hill Rd. |
| nanoscaleworld.bruker-axs.com/nanoscaleworld/ | Santa Barbara, CA 93117 |
| Customer Support: (800) 873-9750 | |
| Copyright 2010, 2011. All Rights Reserved. |