Laboratory dishwasher, Miele G7804.
Responsible:
Anders
Liljeborg
Operating
instructions (pdf)
Operating
instructions, swedish (pdf),
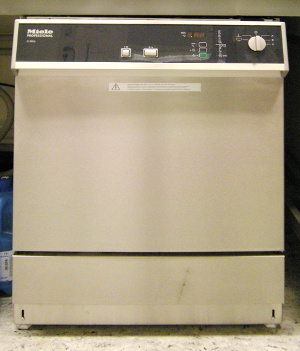
Dishwasher for laboratory glassware.
-
Three different programs.
-
Automatic pump for detergent.
-
Washing temperature 70°C.
-
Rinsing in de-ionized water.
Before loading glassware, ensure that there are no residues of
solvent, especially hydrochloride acid or chlorides, get into the wash
cabinet.
Remove all stoppers, corks, labels, sealing wax residues, etc.
The spray arms must not be blocked. Check clearance by manually
rotating the spray arms.
Warning! The water temperature is 70°C, there is risk of burning
or scalding if touching glassware or inner parts immediately after
program finish.
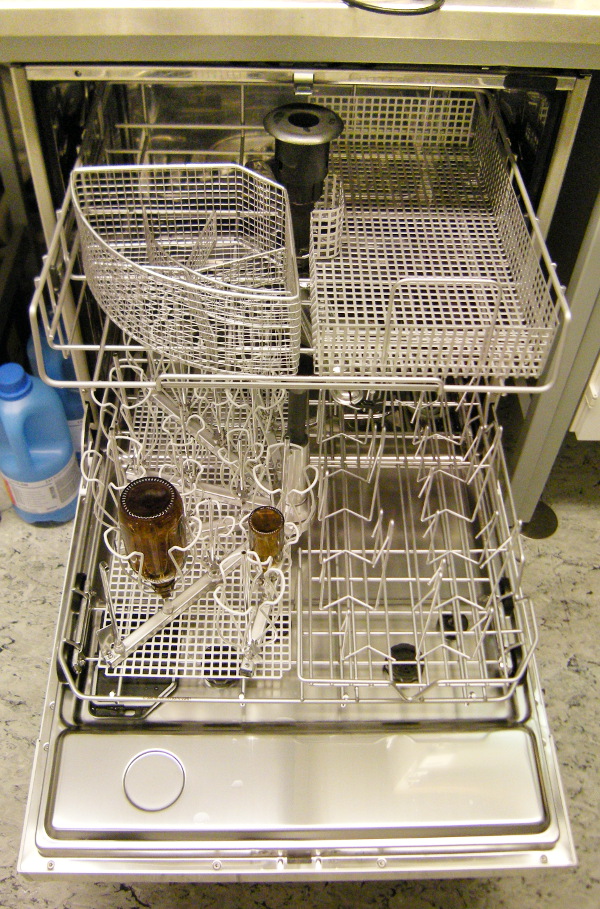
Two trays for glassware with different fittings for
different types of glass ware.
Three spray arms for water distribution.
- Top left: basket with lid for small items, small beakers, short
pipettes, etc.
- Top right: general basket for medium sized items.
Please note! The water sprays are quite forceful and can easily
lift and turn over lighter items.
- Bottom left: Injector tray for narrow necked glasses.
- Bottom right: Spring holders for measurement cylinders, test tubes
etc.
|
|
|
|
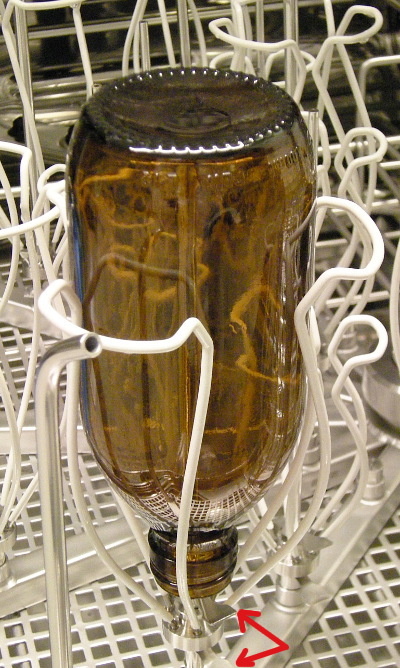
Bigger bottles should be put in the bigger injector holders. Please
note that the height of the holder can be adjusted with a flexible
spring (red arrows). The height should be adjusted so the injector
tube is NOT
touching the bottle in order to insure proper water flow inside the bottle.
|
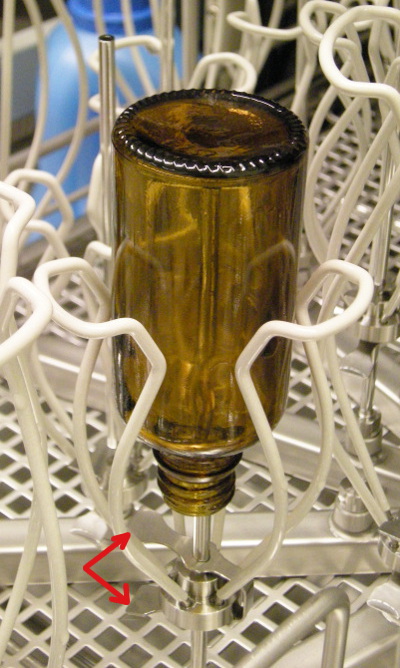
Here is the injector holder for smaller bottles. Note that here the
holder is badly adjusted, the bottle is resting on the injector tube,
thereby partly blocking the water flow inside the bottle.
|
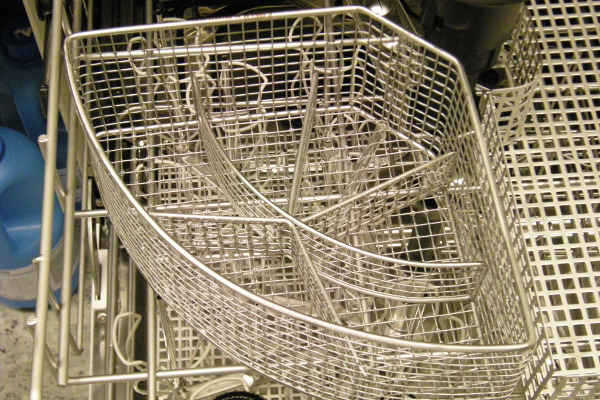
Here a small pipette is put into the basket for small items.
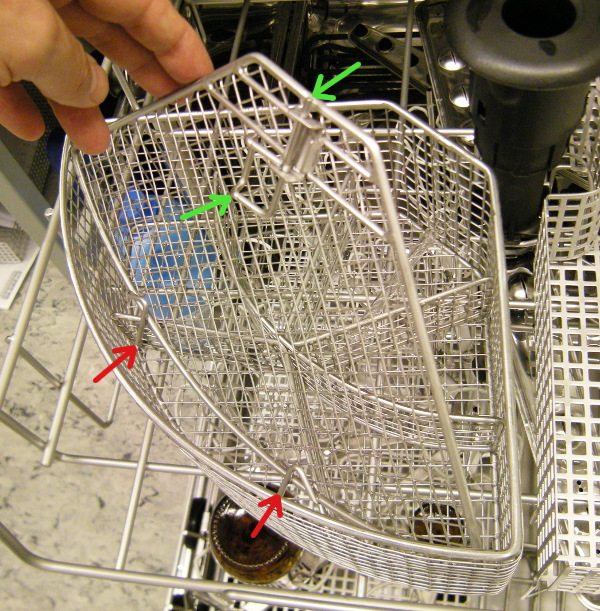
It is very important to fit the lid into the basket, otherwise the
small items will be lifted out of the basket by the water sprays and
will probably break.
The lid is fitted by inserting the pins at the back (rounded edge,
red
arrows)
into appropriate holes in the net on the rounded side of the
basket. Then the lid is lowered and secured
with the sliding pin at the front short edge (green arrows).
|
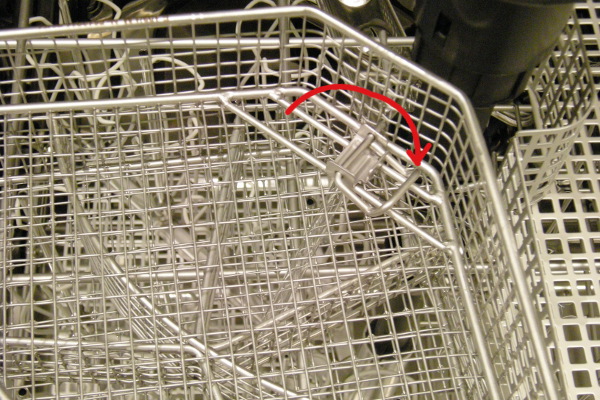
|
The lid must be secured by sliding pin through a fitting hole in the
net and move and press down the handle to the right (red
arrow).
|
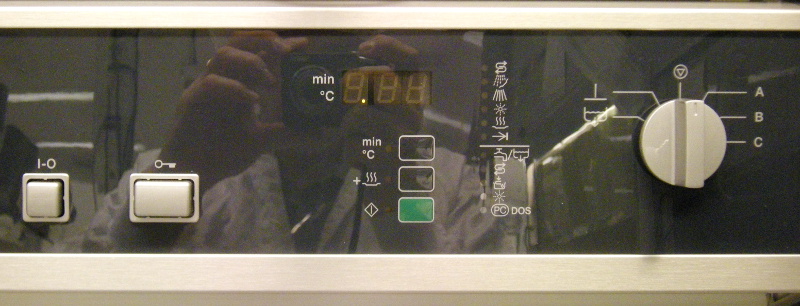
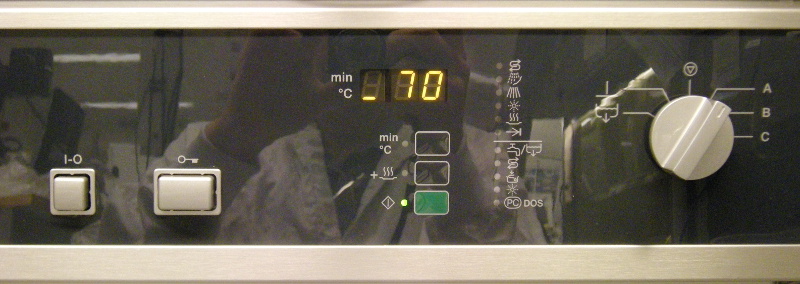
Front panel, from left to right:
- On/Off switch
- Door opener
- Temperature/elapsed time display
- Function buttons
- Indicators of program progress and detergent/rinse agent
being low
- Program selector
The machine is usually turned on. If it is turned off you cannot open
the door. There are three washing programs:
- A - Lightly dirty instruments, water soluble dirt, no
pre-rinse. Time about 20 minutes.
- B - Normal dirty instruments where dirt under some circumstances
is water soluble and can be resolved with alkaline detergent at
higher temperatures. No pre-rinse. Time about 30 minutes.
- C - Heavily dirtied instruments where dirt under some circumstances
is water soluble and can be resolved with alkaline detergent at
higher temperatures. Pre-rinse is used. Time about 35 minutes.
-
Selector to first position to left - Rinse only cycle, 5-10 minutes.
-
Selector to second position to left - Drain, pump out remaining water
out of the machine, typically after an aborted program.
|
-
Mount the glassware according to the pictures above.
-
Select the program you need.
-
Start by pressing the green button with the green blinking light
(center of control panel).
-
During the program the display can show elapsed time in minutes or the
water temperature.
The display is switched with the button labelled
"min / °C".
-
When the machine is finished there is a beep for about 20 seconds and
the indicator lights perform a "wandering light" up an down.
|
|
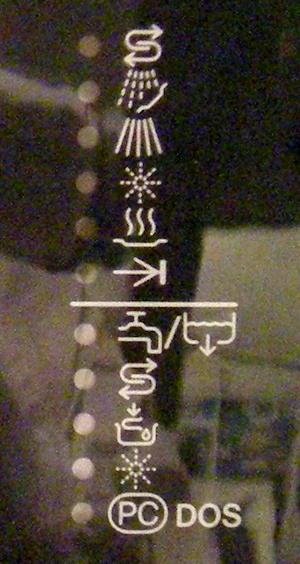
Program sequence indicators
Recharging (water softener, not used)
Pre-wash
Wash
Rinse
Dry
Complete (program finished)
Error indicators
Fill/Drain
Recharge Softener (water softener, not used)
Add Neutralizer
Add Rinse Aid
Add Detergent
|
Anders Liljeborg
Albanova Nanofabrication Facility.