|
|
There is an adjustment procedure (#10) found under the adjustment tab in the GUI. This gives a much wider adjustment range than the normal user interface controls.
Please note that this procdure is ONLY to be carried out by Nanolab Managers.
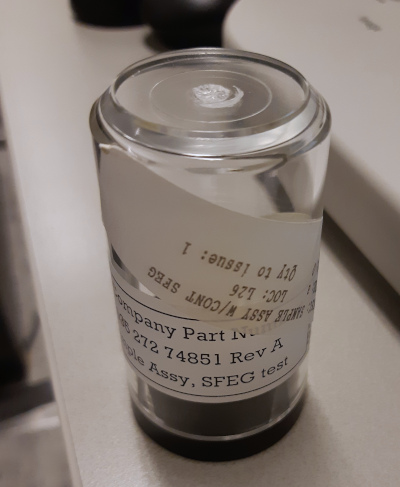
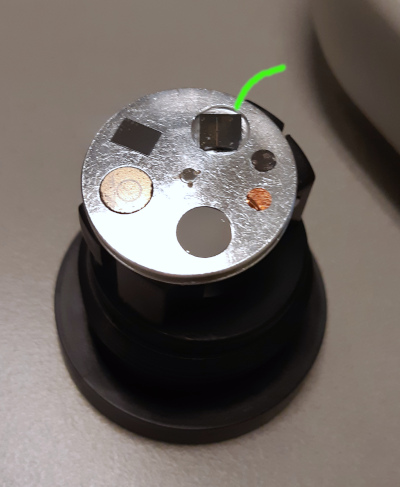
The sample must be the stub with six or seven different chips distributed in a circle, provided by FEI. Select the one with etched crosses about 100 µm in size (indicated by green line).
|
|
|
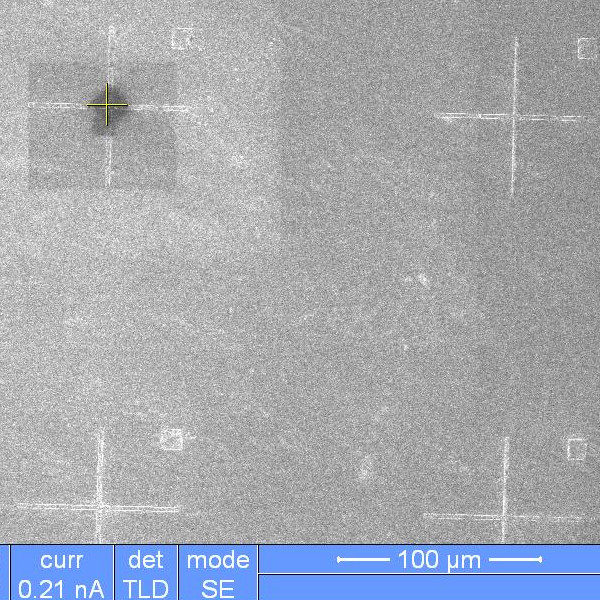
Before starting the adjustment, find a cross and center the image on it, adjust focus, stigmation for best image quality. Do NOT use the high resolution "Immersion Mode"
|
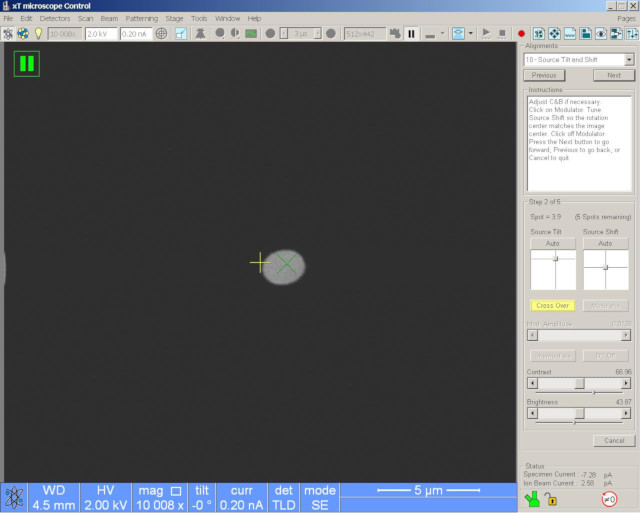
| Here is a part of the sample to use. The upper left cross has already been used for adjustment. For some reason the image area is rotated 45 degrees during the adjustment, as can be seen from the dark area. |
|
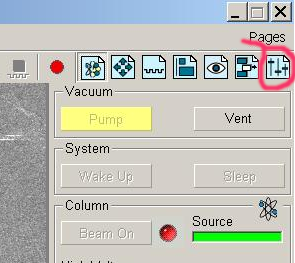
| The tab for adjustments is found to the far right in the upper corner of the GUI. |
|
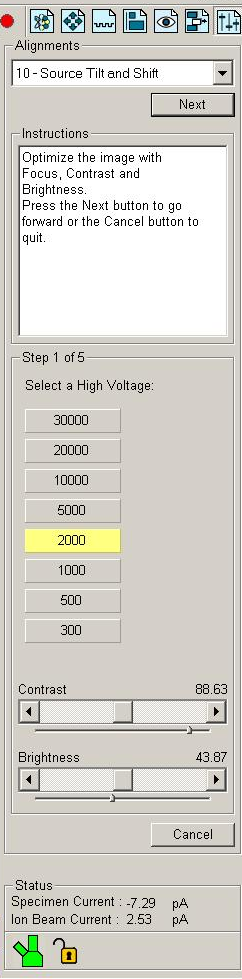
Here is start point for the adjustment #10 of the E-gun. There
are some instructions at the top, then there is a selector for
the acceleration voltage.
Since all the normal adjustment controls from the GUI are not displayed here, it is necessary to use the Dial box to make adjustments to get a reasonable image. Most of the settings from the normal GUI are changed when starting this adjustment, so you have to readjust the image. The magnificaion is also changed, and should be left alone, except for extreme cases when you try to squeeze the most out of an old E-source. This is mostly necessary for the higher currents. The procedure is that you first select the voltage, then adjust all the currents (apertures, spots) for that voltage. Then select another voltage and repeat for all the spots again. And so on. Select the voltage. Click "Next" at the top. |
|
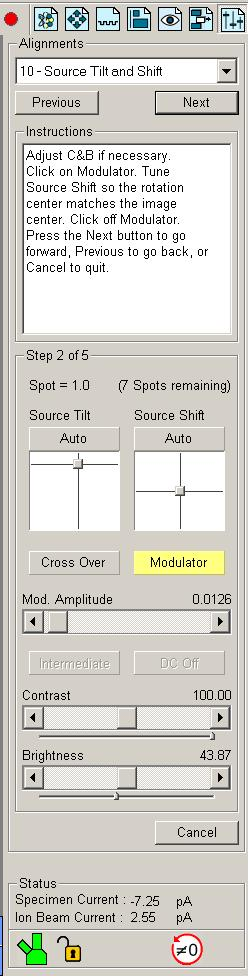
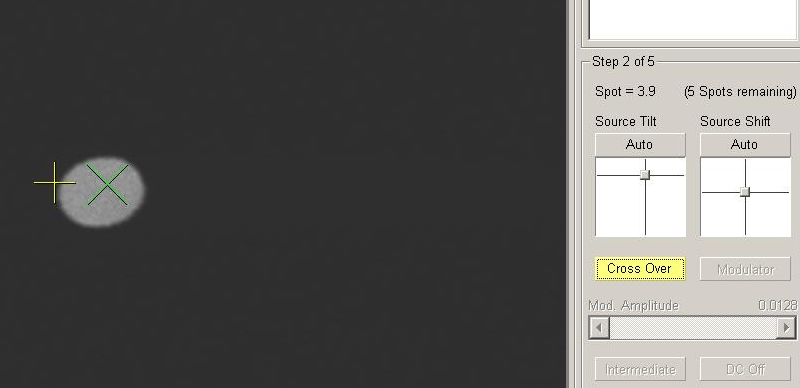
Here is the adjustment done for a particular spot.
Usually you start by clicking "CrossOver" and adjust
the white "blob" so it is encircling the green cross
in the image, see lower resolution picture below. The bright
"blob" does not have to be perfectly centered on the
green cross.
Then click "Cross Over" again to return to normal image. Click "Modulator" to activate a sort of focus wobble, the focus is shifted up and down rather quickly. Here you should adjust so that the image of the cross is not moving up/down or left/right, it should be stationary while going in and out of focus.
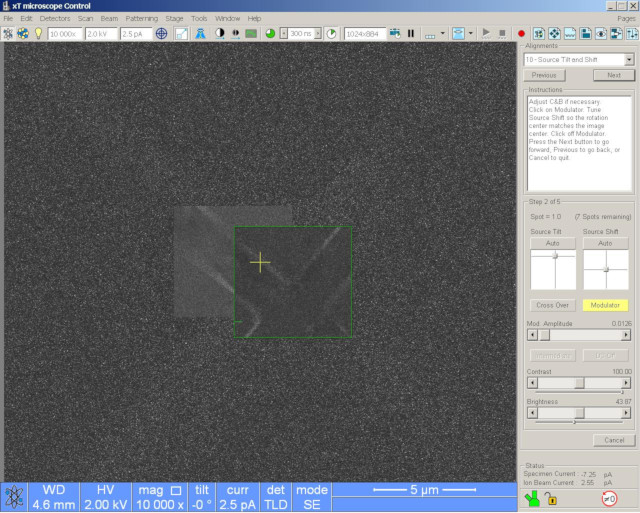
It can be difficult to get a high enough image rate to see the
movement of the cross, great help is to use the subwindow
Another very important setting for a high image rate is the collected image size. It is possible to acquire images with higher resolution that the screen can show. This is good for acquiring and saving publication quality images. But the screen only shows the same amount of pixels, and the image rate goes down. Therefore always check the image size.
The image sizes are selectable:
|
|
| Here the subwindow is used to get enough image rate to follow the translations of the cross while adjusting the "Source Shift". |
|
| "Cross Over' mode for a spot with low current. The "blob" is rather large and easy to adjust so it coincides with the green cross. |
|
| Same but the whole picture. |
|
|
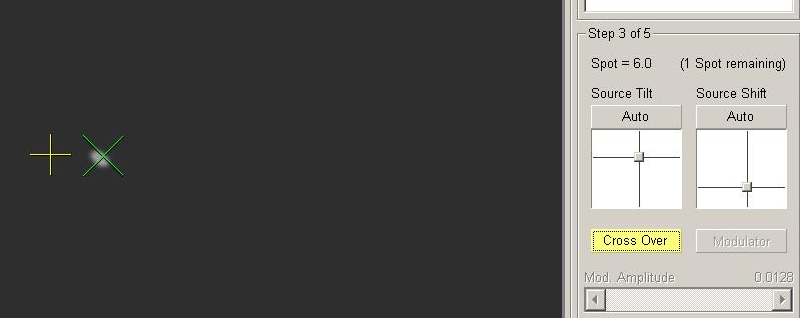
"Cross Over" mode for a spot with high current. The
"blob" can be very small and difficult to see. You
may have to turn up the contrast to be able to see it.
Sometimes the misalignment can be so large that the blob is not visible at all. Then you can try to adjust the "Source Shift" control as well, it is possible to make the blob visible this way. Then try to position it on the green cross by adjusting both "Source Shift" and "Source Tilt" without the "Modulator" activated. Although the adjustment will not be optimal, you can squeeze out some more lifetime of the FEG source before it has to be replaced. |
|
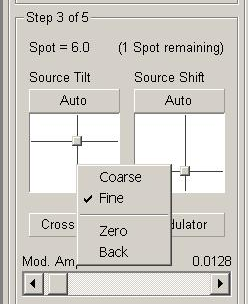
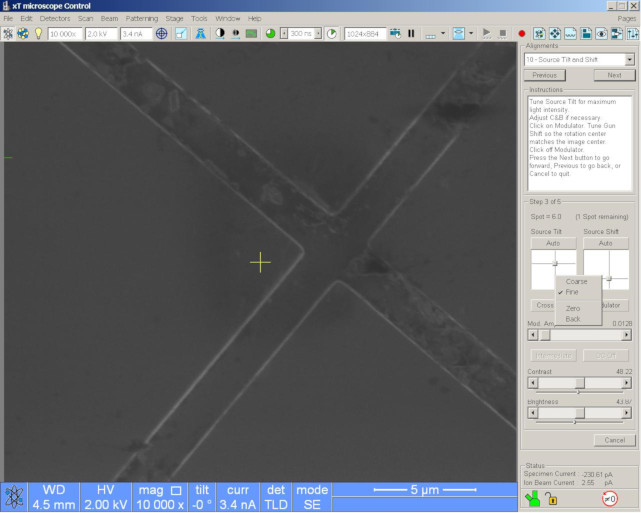
When doing adjustments here, be sure to set the control interface to "Fine", then it is easier to adjust the small "blob". Right-click on the control to change the setting. |
|
|
It can be better to finetune the position of the tiny
"blob" by going back to normal imaging and carefully
adjust the "Source Tilt" for maximum intensity in
the image. There is some misplacement of the green cross which
is noticeable for the tiny "blob".
Click "Next" to start with next current/aperture/spot. When all spots have been adjusted for the current voltage, you get the selection to save all adjustments (which of course you will do) and select a new voltage to start over the adjustments of all the spots. (Missing screenshot). |
 function in the GUI.