KTH Nano-Fab-Lab rod-feed e-gun deposition system
E-gun deposition
The control electronics for the deposition system are all
collected in a rack to the left of the vacuum chamber.
Start of e-gun and deposition
Shut-down of e-gun
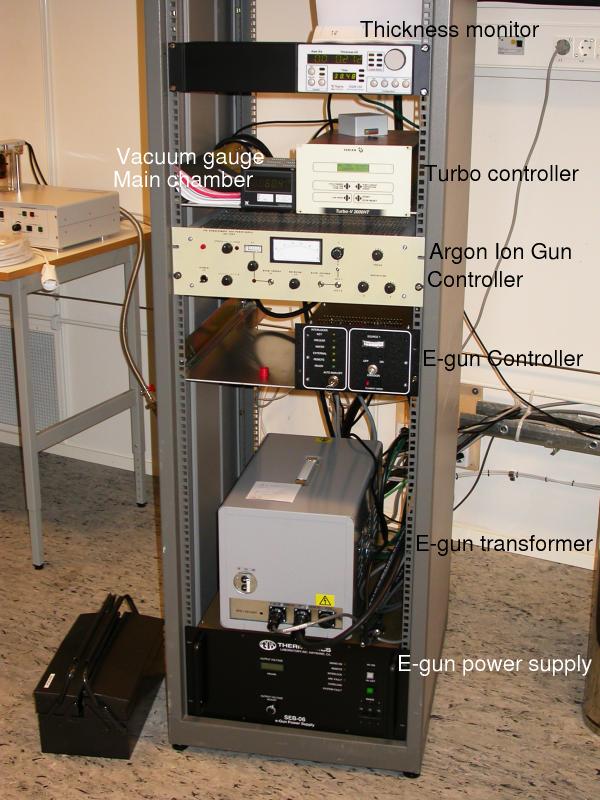
Overview of electronics system
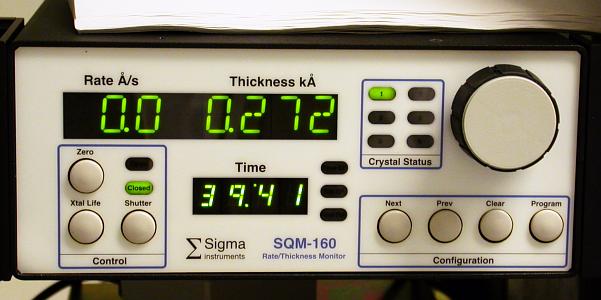
Thickness monitor, showing deposition rate in Angstroms per second and
collected film thickness in kilo-Angstroms (hundreds of nm)
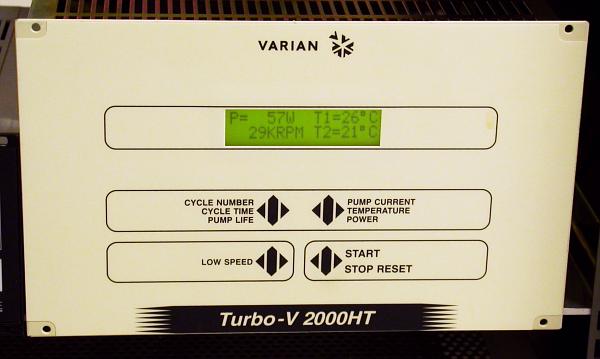
Controller for turbo pump for main chamber.
Display shows power consumption, rotation speed and temperature of the
two bearings.
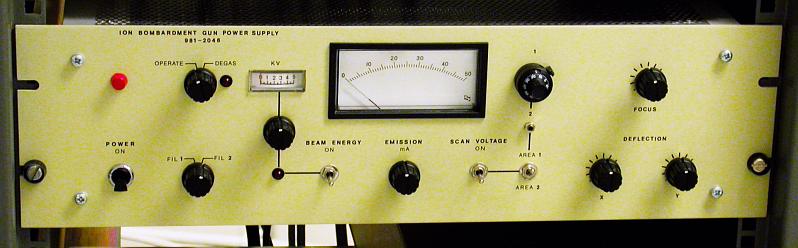
Controller for Argon-ion gun, used for cleaning sample prior to
deposition.

Source controller of E-gun. On/off switch for E-gun, emission current
control knob, interlocks for various external functions.
The cooling water must be turned on in order to use the E-gun.
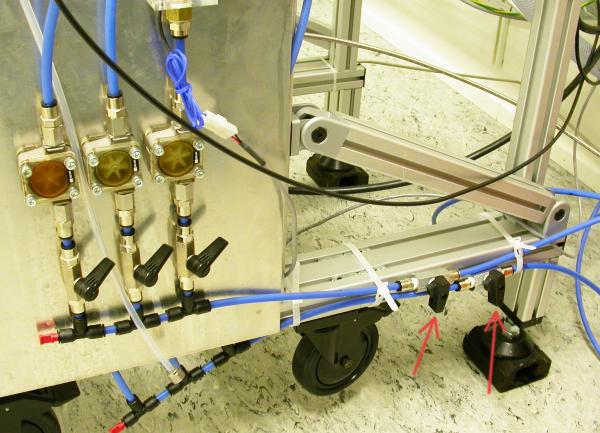
Cooling water circuits, two for the e-gun and one for the
thickness monitor sensor.
There are two valves to the right, indicated with red arrows
which always should be
used to open and close the cooling.
They are here shown in the closed position.
The three valves to the left should be opened
so all three flow-wheels (rota-meters) rotate.
Do not adjust these unless necessary.
The wheels need only be slowly rotating, that is enough cooling power.
The valve at the heat exchanger in the service room
should always be open.
This cooling circuit is shared with the FEI SEM.
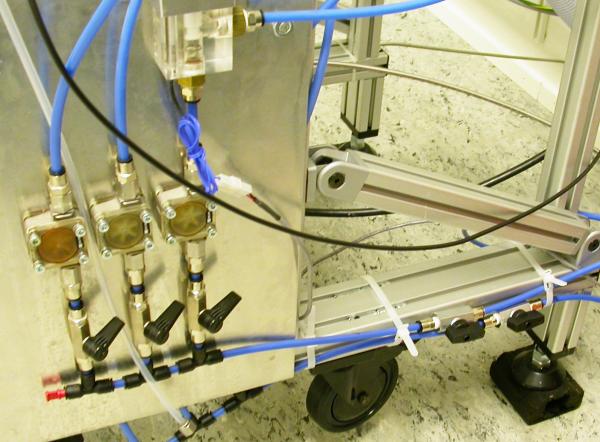
Here the main valves are shown in the open position.

E-gun transformer, the heated filament giving off electrons is kept at
a high voltage, about 6 kV.
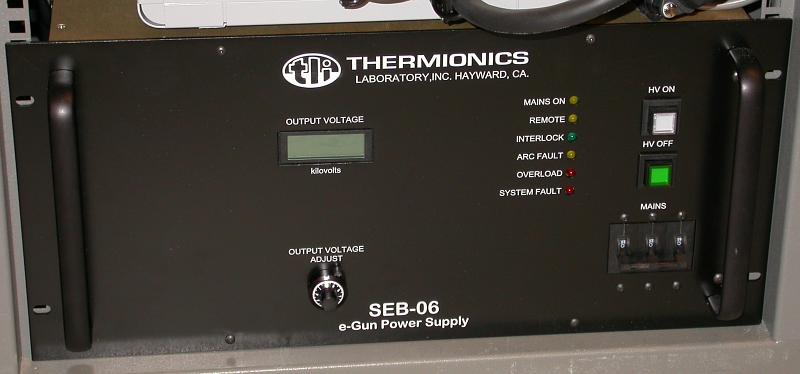
Main power supply for E-gun.
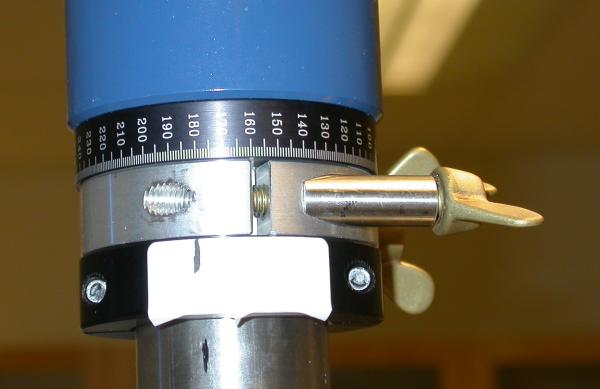
Angle setting for sample holder facing away from e-gun, 180 deg.
This is correct position for mounting sample in load-lock.
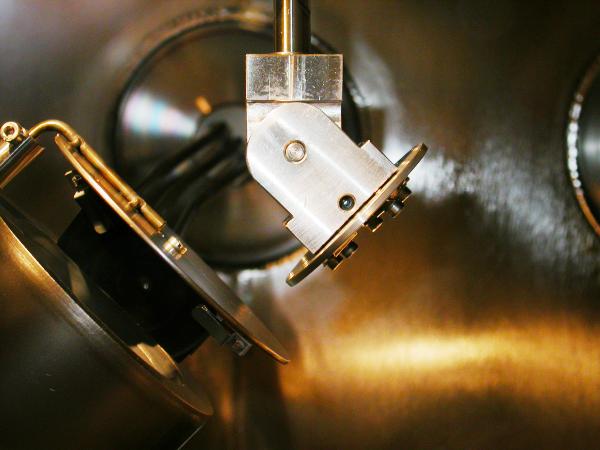
Sample holder facing away from e-gun.
Angle setting for sample holder facing towards e-gun for deposition.
Start of e-gun and deposition
-
Turn on Source Controller by turning key to Manual.
-
Turn on cooling water with the three valves at the side of
the system.
Try to balance the water flow so all three flow-wheels (rota-meters) rotate.
The wheels need only be slowly rotating, that is enough cooling power.
If the rota-meter wheels do not rotate; check
cooling water circuit in service room.
-
Check on Source Controller that Water interlock LED (yellow) is lit.
-
Check that all three flow-wheels (rota-meters) are moving for the three
cooling circuits, if not; fine-tune with the separate valves.
-
Turn on the e-gun transformer, big gray box.
-
Turn on the main power supply (SEB-06).
-
Press "HV ON" button on SEB-06.
-
Check that the voltage is set to 5.8 kV, if not, adjust with
"OUTPUT VOLTAGE ADJUST".
The voltage should be left at this setting when shutting off,
no need to ramp down.
-
If you are very careful you rotate the holder to 180 deg., away from the
e-gun. This to avoid any deposition when setting the rate.
-
On the Source Controller check that the "EMISSION" knob is
at zero.
-
On the Source Controller turn on the source by pressing "ON"
button.
-
Slowly increase "EMISSION" knob to heat up the end of the alumina
rod.
-
-
During ramp-up, check in the view-port for small sparks at the edge of the rod.
-
If these are present the electron beam is not hitting the rod at center.
Adjust HV on SEB-06 slightly to make sparks disappear, try within interval
of 5.5 kV to 6.0 kV.
-
If this does not remove the sparks, call person responsible for system.
-
The sensor of the thickness monitor is under the shutter, constantly receiving
deposition. You should see the rate increase during ramp up. There is a time
delay 5-10 sec. for correct value due to heating effects.
-
On the Source Controller check the "EMISSION" current meter,
do not go above 0.6 A.
-
On the rod there should now be a reddish glow that is pulsating slightly
over the rod end-surface. The surface should be mirror-like shiny, since
the end of the rod should now be liquid.
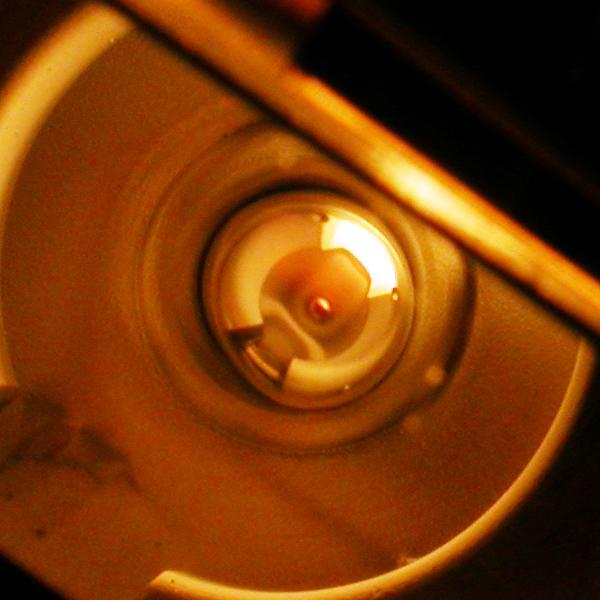
Top of alu-rod when properly heated by e-beam. Surface is mirror-like, note
mirror-image of filament at top right. Image of opening in surrounding
collar at low left. Note also slight reddish area where e-beam is
hitting the alu-rod, roughly in center. Central sharp round feature is
probably mirror image of top opening of cryo-shroud.
-
Check the deposition rate before starting the deposition. Note that there
is a time delay for correct reading due to heating effects. That means
that the rate is not shown correct until after 5-10 sec. after an adjustment
of the emission current.
-
Check rate on thickness monitor. Normally should be around 2 Å
per second.
-
Fine-tune the rate with "EMISSION" knob on Source Controller.
-
Rotate the sample holder to zero deg., so it faces the e-gun.
-
Open shutter and press "Zero" button on Thickness Monitor.
-
Monitor the film thickness on the Thickness Monitor.
-
Close shutter when required film thickness is reached.
Shut down of e-gun
-
On Source Controller turn down the e-beam current to
zero with the "EMISSION" knob.
-
On Source Controller switch off by pressing "OFF" button.
-
On SEB-06 shut off high voltage by pressing "HV OFF" button.
You leave the "OUTPUT VOLTAGE ADJUST" at 5.8 kV.
-
On SEB-06 shut off "MAINS" switch.
-
Shut off E-gun transformer, big gray box.
-
Shut off Source Controller by rotating the key to "OFF".
-
Proceed to unload your sample.
Anders Liljeborg
Nanostructure Physics, KTH.