Dimension Application Module Installation
- Remove the Dimension head.
- Place the application module sensor flush on the flat part of the piezo guard, and tighten it down using the two #2-56 screws. Be careful not to overtighten (see Figure 1).
NOTE: The allen head screws and a matching allen wrench are included in the application module kit.
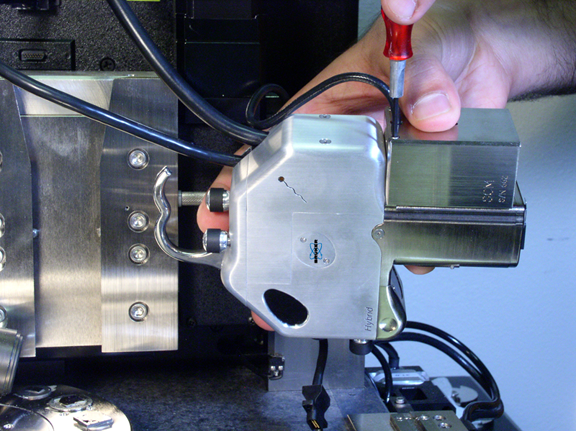
Figure 1: Mounting of the Sensor on the Application Module AFM Scanner
- Install the Dimension head on the dovetail mount by completing the following (see Figure 2):
- Release the clamping screw by turning it counter-clockwise until the head is secure.
- Plug the head 21-pin connector and the application module 15-pin connector into the receptacles on the front of the microscope.
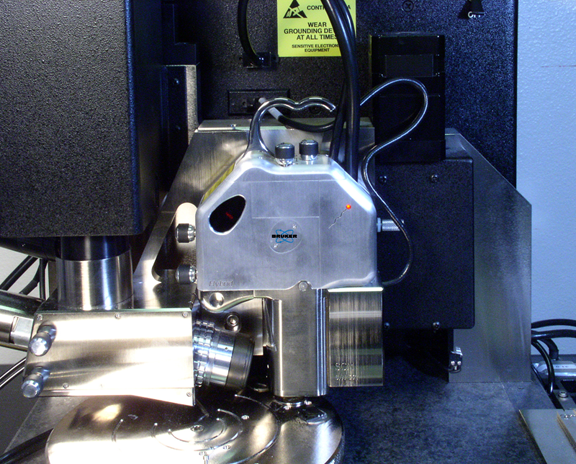
Figure 2: Installed Application Module
- When installing the Dimension head, carefully check the clearance between the sample/stage and the tip/scanner to prevent the tip/scanner from crashing into the sample/stage. If it appears that the tip/scanner may crash when fully inserted, remove the Dimension head completely and execute the Motor > Withdraw command. You may also select Stage > Focus Surface and use the trackball to obtain sufficient clearance and avoid a crash
NOTE: It is very important to release the clamping screw on the dovetail, and ensure the Dimension head is tightly secured in the mount. A loose Dimension head causes a large increase in image noise due to reduced rigidity of the mechanical support of the SPM head.
- Install a probe in the appropriate Dimension probe holder (see Figure 3 in Dimension Hardware Description); for SCM, C-AFM, SSRM and TUNA, refer to your Dimension instruction manual for guidance.
- Insert one end of the Universal Connector into the central single-wire socket of the application module you are installing (see Figure 3 in Dimension Hardware Description). Each application module has an unique location to attach the Universal Connector (see Figure 3).
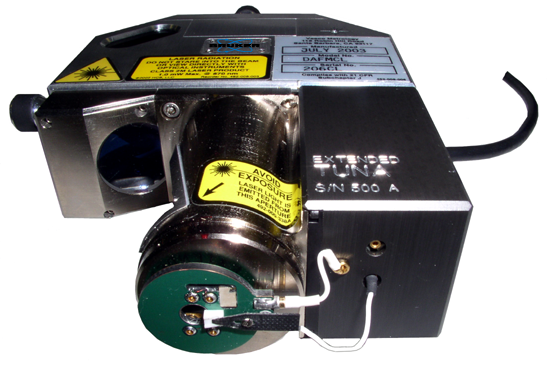
Figure 3: Application Module with Probe Module Universal Connector Installed
| www.bruker.com
|
Bruker Corporation |
| www.brukerafmprobes.com
|
112 Robin Hill Rd. |
| nanoscaleworld.bruker-axs.com/nanoscaleworld/
|
Santa Barbara, CA 93117 |
| |
|
| |
Customer Support: (800) 873-9750 |
| |
Copyright 2010, 2011. All Rights Reserved. |
Open topic with navigation