Glovebox Probe Installation
Probe replacement is more difficult inside a glovebox. The following procedure details the steps needed to replace a probe in an air probe holder that is on a Dimension Icon microscope inside a glovebox:
- Remove the Dimension Icon head from the dovetail.
- Using tweezers, remove the probe holder from the Dimension Icon head.
- Put the Dimension Icon head temporarily back into the dovetail.
- Mount the probe holder onto the probe holder stand, shown in Figure 1.
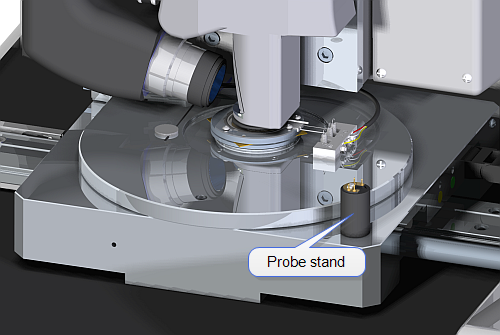
Figure 1: Integrated probe holder stand attached to the Dimension Icon chuck base.
- Replace the probe in the probe holder.
- Take the probe insertion tool, shown in Figure 2, and place the probe holder tip down in the tool as shown in Figure 3.
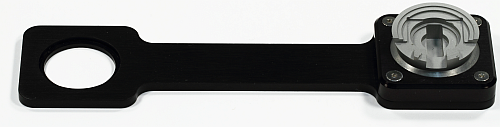
Figure 2: The probe insertion tool.
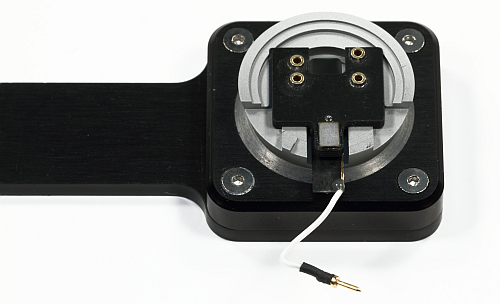
Figure 3: Probe holder mounted in the probe insertion tool.
- Remove the Dimension Icon head from the dovetail.
- With the Dimension Icon head in one hand, use the other hand holding the probe insertion tool to mount the probe holder on the Dimension Icon head.
- Put the Dimension Icon head back into the dovetail.
- Secure the Dimension Icon head in the dovetail by tightening the setscrew.
| www.bruker.com
|
Bruker Corporation |
| www.brukerafmprobes.com
|
112 Robin Hill Rd. |
| nanoscaleworld.bruker-axs.com/nanoscaleworld/
|
Santa Barbara, CA 93117 |
| |
|
| |
Customer Support: (800) 873-9750 |
| |
Copyright 2010, 2011. All Rights Reserved. |
Open topic with navigation