NOTE: These parameters, with the exception of Auto Contrast, can be pre-set using the
Set As Tiff Import Default button in the Color tab (see
Color Tab Parameters for more information).
- Color Table ID: Chose a standard NanoScope color table.
- Contrast: Image contrast.
- Range and Settings: –10 to +10.
- See Contrast for more information and examples.
- Offset: Adds or subtracts a constant offset from each color table index, shifting the color scale up or down. Offset effectively changes the color value around which the color scale is mapped.
- Range and Settings: –128 to +128.
- See Offset for more information and examples.
- Auto Contrast: Auto Contrast automatically adjusts the image contrast by first clipping a small, user-adjustable, number of pixels, Low Clip and High Clip, to accommodate long tails in the contrast distribution. Auto Contrast is turned on if checked.
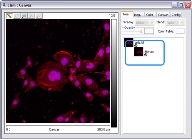
Figure 1 shows the original tiff image and Figure 2 shows a graph of its intensity (long tails are circled):
Figure 1: Original Tiff Image
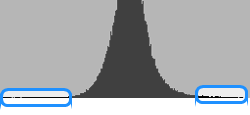
Figure 2: Graph of Image Intensity of image in Figure 1 showing the tails in the distribution
Auto Contrast removes the long tails in the distribution then adjusts the dynamic range to fill the range.
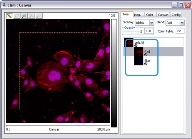
Figure 3 shows the original tiff image before import and Figure 4 shows a graph of the corresponding image intensity:

Figure 3: Original Tiff Image Before Import

Figure 4: Graph of Image Intensity of image in Figure 3
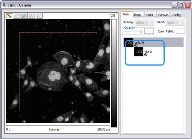
Figure 5 shows the same tiff image after Auto Contrast adjustment, and Figure 6 shows a graph of the corresponding image intensity:
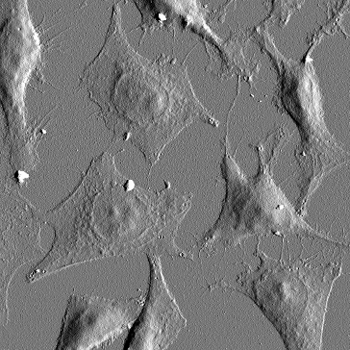
Figure 5: Image After Import with Auto Contrast On
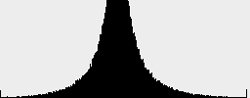
Figure 6: Graph of Image Intensity of image in Figure 5

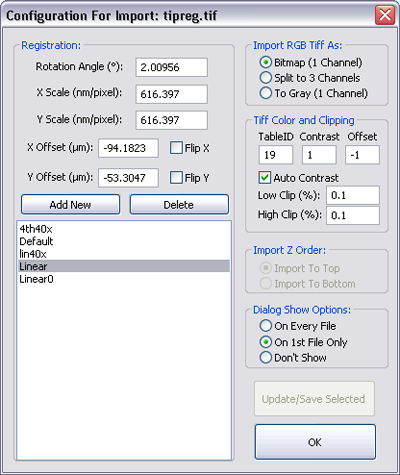
 Import RGB Tiff Parameters