Basic PeakForce QNM Operation
This section describes how to perform a simple PeakForce QNM experiment. Later sections will discuss PeakForce QNM parameters and their influence on the measurements.
Select the Microscope
Follow the Select Microscope procedure described in your microscope Instruction Manual
Select Mode of Operation

|
- Click the Select Experiment icon. This opens the Select Experiment window.
|
| |
- Select Mechanical Properties in the Experiment Category panel.
- Select Quantitive Nanomechanical Mapping in the Select Experiment Group panel.
- Select PeakForce QNM in Air in the Select Experiment panel and click Load Experiment.
-
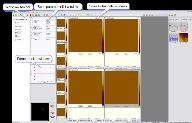
This opens the Workflow Toolbar, the Scan 4 Channels (Icon) windows, the Force Monitor window and the Scan Parameters List window, shown in Figure 1.
|
(Hover over the image to view larger)
Figure 1: PeakForce QNM in Air (Simple Mode) configuration
Head, Cantilever and Sample Preparation
- Install a suitable probe onto an AFM cantilever holder. See PeakForce QNM Probe Selection.
- Load the cantilever holder with installed tip into your microscope.
Align Laser
Align the laser using the laser control knobs.
NOTE: Coated cantilevers are strongly recommended to increase the laser sum signal and decrease interference effects.
NOTE: Maximize the laser sum signal to avoid optical interference.
NOTE: Try not to change the laser spot position during the experiment. This may change the Deflection Sensitivity and therefore the property measurements.
Set Initial Scan Parameters
Scan Panel
In the Scan panel of the Scan Parameters List, set the following initial scan parameters See Figure 2.
- Set the Scan Size.
- Set the Scan Angle.
Feedback Panel
- Set ScanAsyst Auto Control to On See Figure 2.
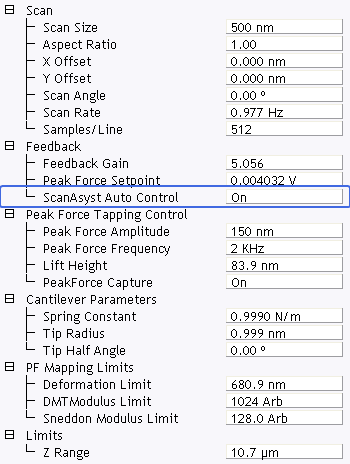
Figure 2: PeakForce QNM in Air (Simple Mode) Parameters Panel
Channels
| |
- Set the Channel 1 Data Type to Height Sensor (see Figure 3).
- Set the Channel 2 Data Type to Peak Force Error (see Figure 3).
- Set the Channel 3 Data Type to DMT Modulus (see Figure 3).
- Set the Channel 4 Data Type to LogDMT Modulus (see Figure 3).
- Set the Channel 5 Data Type to Adhesion (see Figure 3).
- Set the Channel 6 Data Type to Deformation (see Figure 3).
- Set the Channel 7 Data Type to Dissipation (see Figure 3).
|

|
- Set Data Scale to a reasonable value for the sample or click the AutoScale icon after engaging.
|
| |
NOTE: For example, for a 200 nm step height calibration sample, a reasonable Data Scale setting is 300 nm initially.
- Set Line Direction to either Trace or Retrace.
|


Figure 3: Suggested PeakForce QNM Channel Settings
Engage

|
- Select Microscope > Engage or click the Engage icon on the Workflow Toolbar. A pre-engage check begins, followed by Z-stage motor motion
|

|
- To move to another area of the sample, execute a Withdraw command to avoid damaging the tip and scanner.
|
Image the sample
- If needed, right-click in the Force Monitor window and click UnDock. See Figure 4. You may Dock the undocked Force Monitor window by right-clicking in it and clicking Dock.
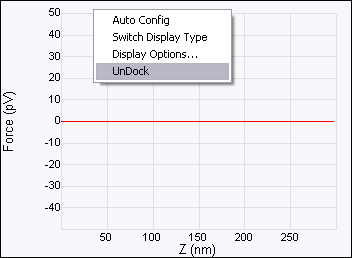
Figure 4: UnDock the Force Monitor window
- Select one plot to be Force vs. Time and the other to be Force vs. Z.
- Once scanning, the Force Monitor window, shown in Figure 5, should display a Force vs. Z plot and a “heartbeat” (Force vs. Time) plot.
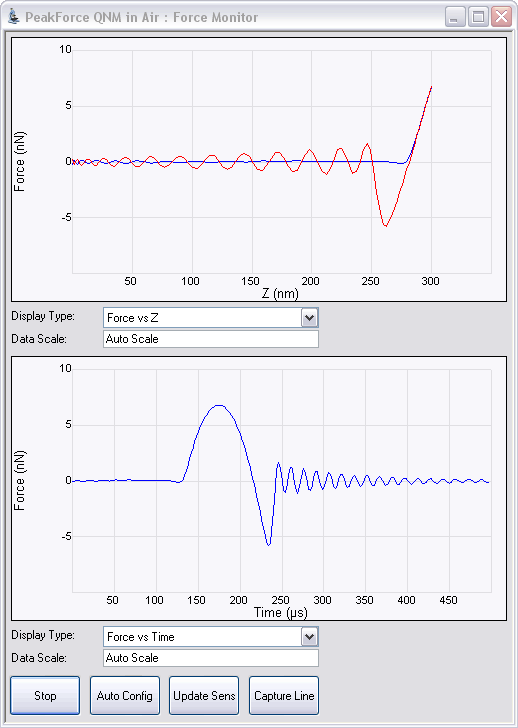
Figure 5: The Force Monitor window
NOTE: The cantilever oscillation after it snaps off the sample surface, shown in
Figure 5, is normal. On occasion this oscillation will continue until the probe tip again contacts the sample surface. This oscillation will be heavily damped by this contact. Even if the oscillation is not fully damped, the remaining oscillation at the force peak will be small and will merely add a small amount of noise to the feedback.
- The Height channel in the Scan window, shown in Figure 6, will display a topographical image of your sample.
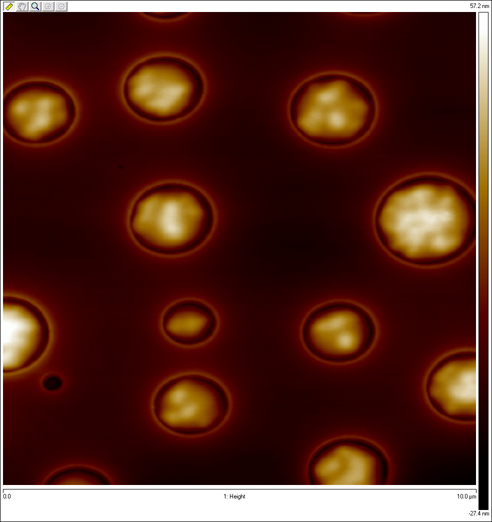
Figure 6: Height Image of a PS + LPDE blend.
| www.bruker.com
|
Bruker Corporation |
| www.brukerafmprobes.com
|
112 Robin Hill Rd. |
| nanoscaleworld.bruker-axs.com/nanoscaleworld/
|
Santa Barbara, CA 93117 |
| |
|
| |
Customer Support: (800) 873-9750 |
| |
Copyright 2010, 2011. All Rights Reserved. |
Open topic with navigation