NIS Elements Imaging software, short intro

This is a very short introduction to NIS Elements software, Documentation version. This contains a lot of measurement functions, lengths, areas, circumference, diameter, etc.

Manufacturers manual, v. 5.10
Yellow lab microscope and second microscope in proc.lab.

Manufacturers manual, v. 5.30 New!
First microscope in proc.lab and stereo microscope

First microscope and stereo microscope, switch cameras

On computer connected to first microscope and stereo microscope in process lab:
Software upgraded to v. 5.30, most functions are the same.


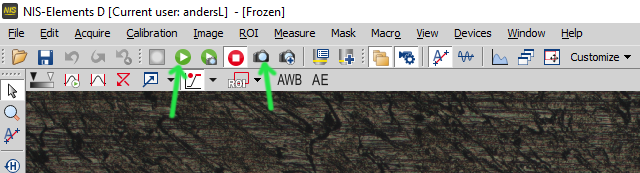
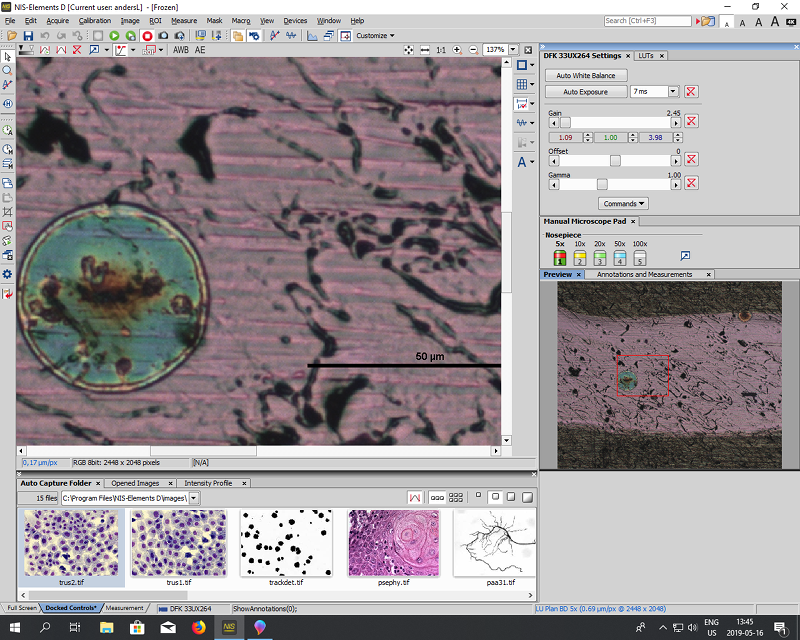
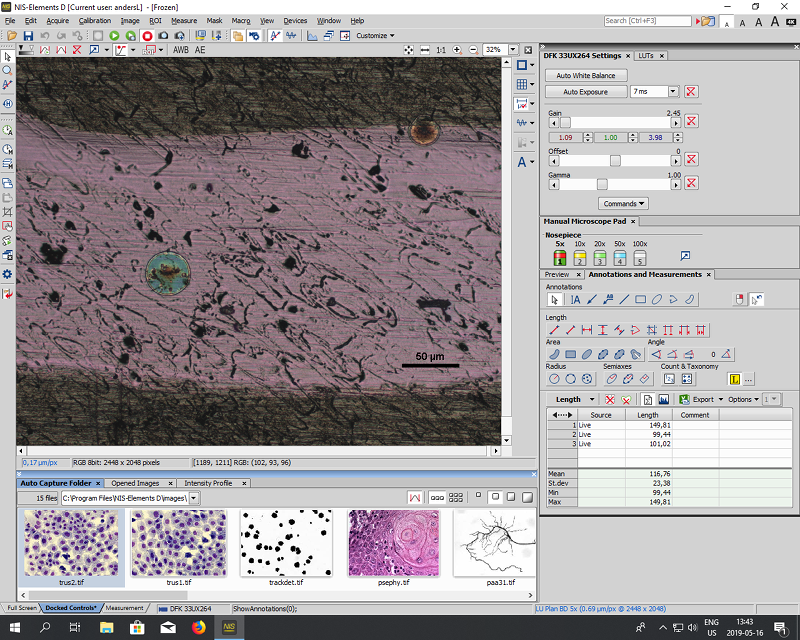
It is a "one window" GUI, with several parts. At the top are the drop down menues, below that a row of function buttons. At the left side there are another set of function buttons for zoom, measure, crop, settings, etc.

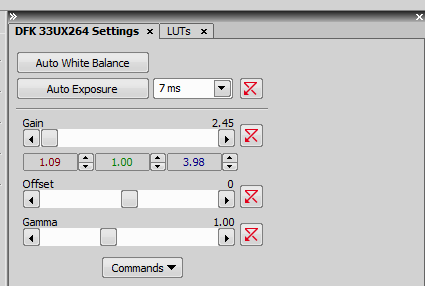
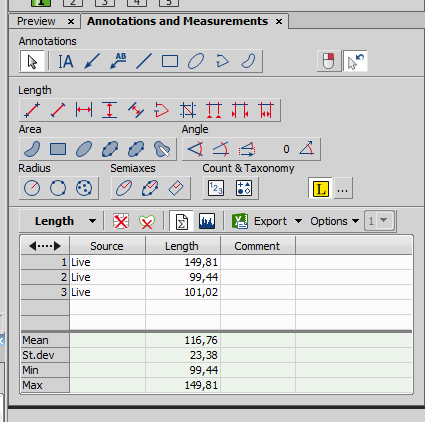
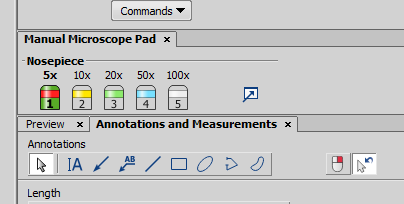
To the right are exposure controls, objective selection, measurement functions with export functionality. At the bottom is an overview of already saved pictures.


The most basic function buttons are perhaps the "Live" button starting a live image on the screen (green button with white triangle). The other is "capture image" to acquire one image into working memory (camera button).

Please note that the image is now only residing in RAM, not saved to disk.


Live image rate


The live image frame rate should be as high as possible. It makes it much more easy to set the correct focus.

This can be controlled by opening the camera control settings. This is done from drop down menu Acquire -> Camera Settings. Here the fastest setting for live image capture is 640x476 Central, as indicated in screen shot above.

This is especially important for the microscope next to the refrigerator, since it has an older (and slower) model of camera. You can find more details about this in chapter 5 of the manufacturers manual


The live image can be zoomed interactively with the scroll wheel on the mouse. The Preview image at the lower right can be used to roam around in the zoomed image.


Exposure controls. When using Auto White Balance be sure to have a white area in the image, otherwise the color representation will be very wrong.

Auto Exposure can be used, or the exposure time can be selected manually for more control. Gain can be used to help up very dark images, but this will introduce noise if used to much.

Offset is just a brightness level, Gamma can be used to make darker areas appear brighter, while keeping bright areas not too bright.


Measurement functions with measurement data showing in the table at the bottom. This can be exported to various formats for post processing.


The objectives has all been calibrated, BUT if the measurements shall be meaningful it is absolutely necessary to select the corresponding objective in the software.

Please note that there is no sensor that detect which objective is used!

Here the 5× objective is selected (green).


The right hand part of the GUI can be configured by the user. All the tabbed parts can be undocked and moved around. The whole right hand part can be minimized by the small double arrow at the top left. The tabs can be removed by the little × on each tab. Then they can be shown again by a drop down menu.


Anders Liljeborg Albanova Nanofabrication Lab, KTH, SU.