Capturing An Image
Once you have adjusted the scan parameters, you can capture a scanned image. Perform these steps once a scan you want to capture is in progress.
| |
- You can capture a scan in any one of four ways:
|

|
- Click the Capture icon in the toolbar.
|

|
- Click the Capture Now icon in the toolbar.
|
| |
- From the menu bar, select Capture > Capture.
- From the menu bar, select Capture > Capture Now.
The scan will continue. Notice that the Status bar at the bottom of the NanoScope window (see Figure 1) says “Capture: On.” When the current scan is complete, the image will be stored automatically in the Capture Directory with the file name indicated in the status bar.
|

Figure 1: Status Bar
| |
NOTE: If parameters are changed during a scan, the capture is interrupted. To force the capture, click the Capture icon a second time. The more recent parameter value entries are saved with the image.
|
| |
- The file name and directory can be changed by selecting Capture > Capture Filename from the menu bar (see Figure 2).
|
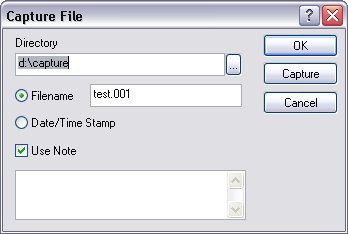
Figure 2: Change Filename

|
- You may also select the capture filename by clicking the Select Capture Directory icon and/or the Date/Time Stamp, shown in Figure 3, icons on the menu bar.
|

Figure 3: Date/Time Stamp menu bar
| |
Capture Now, and Capture Last save as much of the image buffer as possible including parts of it that were generated with different parameters such as gains, setpoints, etc., so some of the information in the header may be incorrect for some parts of the saved image.
|
|


|
In the Image Browser area (see Figure 4), check to see if you are looking at the Capture Directory. If not, select the Capture Directory icon, shown at left, (or click the “...” button and select the Capture Directory, which is usually d:\capture). If you don’t see the Image Browser, click the Show/Hide Browse icon on the toolbar. |
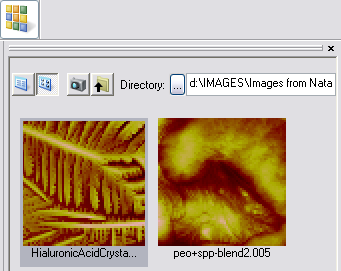
Figure 4: NanoScope Image Browse Window
| |
- Double-click the image you just captured. The image opens in the Image window, shown in Figure 5. Notice that the image filename and an image view are added to your workspace.
|

Figure 5: NanoScope Image View Window
| |
- If you need to change the Contrast, Offset or Color Table, right-click on the color scale of the Image window, and change the appropriate values in the Color Scale popup window, shown in Figure 6. The Color Table may also be changed by clicking and holding the color bar, then dragging the mouse left or right. The Color Table may also be changed by using the left/right arrows when the cursor is inside the Table window. See Color Scale for a list of color tables.
|
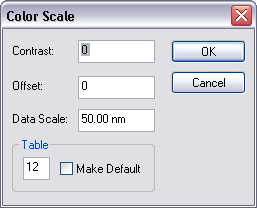
Figure 6: Color Scale
| |
NOTE: To rename image files, you can use File > Save As, use Windows Explorer to rename the file, or right-click on the image in the image browser and select Move.
|
Previous Steps:
Starting NanoScope Software
Preparing a Dimension Series AFM for a Realtime Scan
Scanning and Scan Parameters
Next Steps:
Analyzing an Image With Section Analysis
ASCII Export
High Resolution Imaging
| www.bruker.com
|
Bruker Corporation |
| www.brukerafmprobes.com
|
112 Robin Hill Rd. |
| nanoscaleworld.bruker-axs.com/nanoscaleworld/
|
Santa Barbara, CA 93117 |
| |
|
| |
Customer Support: (800) 873-9750 |
| |
Copyright 2010, 2011. All Rights Reserved. |
Open topic with navigation