
The NanoScope 8.15 toolbar, shown in Figure 1, is described in:
Figure 1: The NanoScope 8.15 Toolbar—single monitor
|
|
Select Experiment | Configures the Scan and Ramp Parameters needed to run an experiment. Select Experiment also configures The Workflow Toolbar. |
|
|
Open | Opens NanoScope files. |
|
|
Save Experiment | Saves the NanoScope Workspace. |
|
|
MIRO | Opens the (optional) MIRO (Microscope Image Registration and Overlay) package. |
|
|
Simple Mode | Makes only essential scan or ramp parameters visible, making operation simpler for NanoScope users. |
|
|
Expanded Mode | Increases the number of visible scan, ramp and channel parameters for more advanced applications. |
|
|
Video | Turns the video (camera) window on and off. |
|
|
Real Time Status | Turns the real time status window on and off. |
|
|
Tune | Opens the Tune window, described in Cantilever Tune. |
|
|
Point and Shoot | Opens the Point and Shoot window. See Point And Shoot and Point and Shoot - High Speed Data Capture for more information. |
|
|
High Speed Data Capture | Opens the High Speed Data Capture window. See High Speed Data Capture for more information. |
|
|
Thermal Tune | Opens the Thermal Tune window. |
|
|
HarmoniX | Opens the HarmoniX window. See the HarmoniX User Guide, Bruker p/n 004-1024-000 for more information. |
|
|
Force Monitor | Opens the Force Monitor window in ScanAsyst mode. |
|
|
Set Phase | Sets the phase in EFM modes. |
|
|
Enable PeakForce Capture | Clicking the Enable PeakForce Capture icon enables the Capture with PeakForce Capture and Capture Continuous with PeakForce Capture functions to capture a force curve at every pixel in the PeakForce QNM mode. |
|
|
Thumbnails Only |
Shows 8 thumbnails only. |
|
|
Two Channels Down |
Displays 8 thumbnails and two channels, arranged vertically. |
|
|
Four Channels |
Displays 8 thumbnails and four channels |
|
|
One Channel |
Displays 8 thumbnails and one, large, channel. |
|
|
Two Channels Across |
Displays 8 thumbnails and two channels, arranged horizontally. |
|
|
Automatically scales the vertical axis. Refer to AutoScale for details. | |
|
|
The Frame Up command restarts the Real-time scan at the bottom of the frame. It is an easy way to begin to view an entire Realtime frame from the bottom. By clicking on this button, the Realtime scan restarts and moves up at the bottom of the frame. This allows you to go directly to the start of the frame and not have to wait for the previous frame to end. | |
|
|
The Frame Down command restarts the Real-time scan at the top of the frame. This allows you to go directly to the start of the frame and not have to wait for the previous frame to end. | |
|
|
Reverses the vertical scan direction from the existing location. | |
|
|
Restarts the scan at a user-specified line. |
|
|
Scan Single | Restarts the scan from the existing probe tip position and finishes the frame plus one complete frame for each increment above 1 of the Scan Single Frame Number. |
|
|
Scan Continuous | Restarts continuous scanning from the existing probe tip position. |
|
|
Pause Scan | Stops scanning while keeping the probe tip in contact with the sample. |
|
|
Plots Only |
Displays the ramp plots. |
|
|
Plots and Controls |
Displays the ramp plots and ramp controls tabs. |
|
|
Ramp Single |
Lowers and raises the probe tip once by a distance equal to the Z scan size, the halts. |
|
|
Ramp Continuous |
The tip is continuously lowered and raised by a distance equal to the Z scan size. This is the normal, default motion during Force Calibrate. |
|
|
Stop |
Halts all tip movement. |
|
|
Single Approach |
The tip is lowered to the surface and raised in a single, controlled step. This process is halted if the surface is encountered by the tip, causing deflection exceeding the Step threshold amount. The resulting force curve is displayed. |
|
|
Continuous Approach |
he tip lowers to the surface and raises in a controlled series of steps, then indexed by the Z step size (see Scan Mode panel) distance. This process continues downward until the tip encounters the surface. When tip deflection exceeds the Threshold Step amount, Continuous Approach halts and the resulting force curve displays. |
|
|
Auto Ramp |
Begins auto ramping as defined by the parameters specified in the Auto Panel. |
|
|
Update Sensitivity |
Updates the cantilever Deflection Sensitivity. |
See Force Curves for more information about ramp functions.
|
|
The Capture command directs the software to save the next complete,uninterrupted frame to a file. A second click will force the software to save the next interrupted frame (i.e. - parameter changed). | |
|
|
Capture with PeakForce Capture | Captures an image as well as a force curve at every pixel in the PeakForce QNM mode. |
|
|
Capture Continuous |
Continuously saves every frame until Withdraw or Abort Capture is selected. |
|
|
Capture Continuous with PeakForce Capture | Continuously saves every frame as well as a force curve at every pixel in the PeakForce QNM mode. |
|
|
Capture Now |
Immediately saves the current uninterrupted image before the frame is complete. |
|
|
Abort Capture |
The Abort Capture command stops the capture process. |
|
|
Capture Last |
Saves the last complete frame prior to the current frame. |
|
|
Sets the capture filename automatically using a date and time format. | |
|
|
Specifies the capture directory. |
Refer to Capturing An Image for details.
|
|
Show Help |
Opens NanoScope Help in a browser window. The F1 function key also opens Help. |
|
|
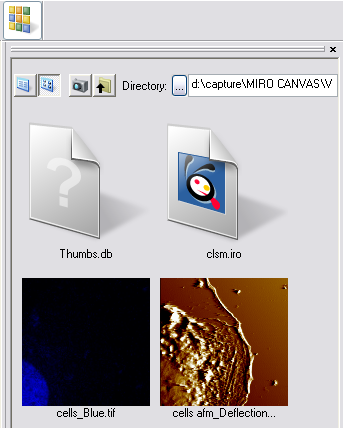
Show/Hide Browse |
Displays the Browse window, shown in Figure 2. See The Browse Window for more information. |
| www.bruker.com | Bruker Corporation |
| www.brukerafmprobes.com | 112 Robin Hill Rd. |
| nanoscaleworld.bruker-axs.com/nanoscaleworld/ | Santa Barbara, CA 93117 |
| Customer Support: (800) 873-9750 | |
| Copyright 2010, 2011. All Rights Reserved. |